Right peeps, I'm back on the ball now! Sorry for the sporadic posting over the last couple of mad weeks...hopefully I can get back to some normality in terms of blogging more regularly. As I had said in my last post, I was at my friend's wedding on Saturday where she married her lovely fiance, Graeme. I thought you might like to see some picaroonies just to get a feel for what the day was like. It was at the Glentanar Estate near Aboyne in Aberdeenshire. It's a traditional Highland estate that was built in 1869 and has 25,000 acres of beautiful landscape surrounding it...we're talking rivers, pine forests and heather-clad moors....gorgeous!

So, first up, here's me and the hubby posing for a pic just before the ceremony. Chris was so chuffed he got another chance to wear his kilt ensemble from our own wedding. I personally think guys look so smart in kilts and to be honest, even though they're wearing a skirt, there really is nothing more masculine! Guys love wearing them because it makes them feel like they're in Braveheart! ha ha. I wore a dress I got from Monsoon a couple of years ago.

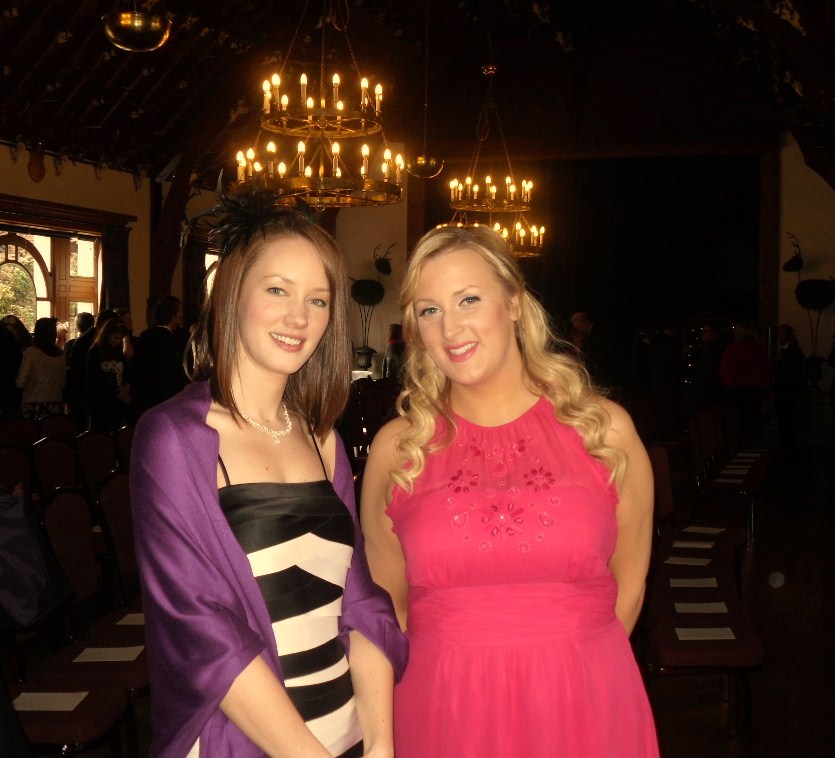
This is another one of my best friends, Pamela, posing with me in the Glentanar Ballroom where the ceremony was being held. I never know how to stand in photographs so I generally end up looking a tad awkward! I know you are supposed to angle your body and put one foots out but I've never mastered it to be honest. The chances of me mastering it ebbed away with each glass of champagne!

But I did try out a token 'hand on the hip' stance...nice try Laura but better luck next time.ha ha.
I loved the atmosphere of the ballroom, it was real old school scottish style with candle chandeliers, stag's heads on the wall, exposed wooden floors, massive fireplaces and heavily beamed ceilings.

All the stag's antlers mounted on the ceiling were shot on the estate, which specialises in rearing deer. Now just for the record, I am not in favour of shooting animals for sport (actually I'm very much against it) but I know that these stags were also used for food which somehow makes it a little easier to fathom. I just wanted to point this out because I know there are a lot of people who feel very strongly about this type of thing. I'm not advocating it by posting these pics!

The whole wedding took place in the ballroom and the dining room attached to it so the whole day had a really lovely, intimate feel to it. We were fed champagne and (I guzzled) delicious canapes all throughout the day and then had a wonderful meal later on.
Chris likes to pull this face randomly in photographs just to intentionally hack me off...I did threaten that if he kept doing it, I would pull his kilt up and thoroughly embarass him!ha ha. Funnily enough, he didn't do it again all night! I did point out that it looked like he was trying to channel Marlon Brando in The Godfather!

After the meal, cake cutting and speeches, there was some ceilidh dancing which I avoided like the plague because I had massive platform heels on and had witnessed a couple of casualties on the dancefloor already! I didn't fancy ending up with my skirt around my neck in front of all those people! 5 inch heels + champagne + wooden floors + celidh dnacing = a trip to A & E.


I did get up later on to bust some moves with the bride and my pals and although I expected my feet to be in some serious pain and spurting blood at this point, they held up surprisingly well! That could have just been all the champagne numbing the pain though. And why is it that when songs come on from the 60's or 70's, you find yourself doing old lady dances...like clicking your feet together, clapping your hands and generally looking like an extra out of Saturday Nigh Fever?
This is Chris being a good boy after my threats of exposing his 'lucky charms' to the world...

Pamela bravely joined in the ceilidh dancing and got vigourously thrown around the place. I feared for her safety at various points of the dance but luckily she emerges unscathed!

The whole day was so much fun and it was both surreal and so lovely to see one of my best friend's begin her married life with her new husband. She looked so radiant and beautiful and I definitely got very teary during the ceremony, especially when her little sister did a heart-felt reading. It was such a happy day and I wish them every happiness for the future.
Congrats to Kat and Graeme!
It brought back memories of my own wedding day and the night was perfectly rounded off by Chris asking me up for the last slow dance. Now this doesn't sound like much, but Chris NEVER dances and he literally hates it. So for him to ask me up there was a big deal for me. He continuously surprises me!
Although I didn't have time to take close up pics of my hair and makeup, I think you get the jist from the pics I have posted. If you are interested in what I used to create this FOTD, then read on...

I wanted my skin to look radiant so I mixed my usual day moisturiser (Dove Silk) with a pea sized amount of No.7 Skin Illuminator in Peach. This just creates a luminescence that shows through your foundation and helps your complexion to look more even. I then applied a VERY thin layer of Loreal Studio Secrets Smoothing Resurfacing Primer over the top to ensure my makeup would apply as smoothly as possible and last all day long.

I then applied my usual trusty foundation, Estee Lauder Double Wear, mixing Fresco with Shell Beige to match my skintone (I had applied Xen Tan Face Tanner Luxe and Xen Tan Deep Bronze on my body the night before). This is the ONLY foundation I can rely on to last all day without fading whatsoever, it's a genuine Holy Grail product that I just don't deviate from.

I used the concealer from the new Bobbi Brown Creamy Concealer Kit (Beige with Pale Yellow powder) under my eyes in a very thin layer. Then over the top of that, I used the brilliant Origins Quick, Hide! Concealer in Light/Medium to set the BB concealer and also further camouflage my dark circles. I finished off by sweeping some of the powder from the BB compact over the top to set everything in place. I used the, quite frankly incredible, Estee Lauder Maximum Cover Foundation in Medium to cover any redness around my nose and also to cover up any blemishes. I don't know how I ever lived without that stuff!

I set my foundation with a wispy light layer of Benefit Hello Flawless powder in Honey. This stuff adds a real airbrushed effect to the skin so it looks flawless for hours on end. I then applied my all time favourite bronzer, Dior Matte Sunshine in Honey Matte, following with Sleek Face Contour Kit in Light to add definition to my cheekbones. My Chantecaille blusher in Joy was the cheek product of choice for a really fresh, natural flush of colour.

When I was deciding on what highlighter to use, there's only one in my collection that would be natural enough for the day time harsh light but also effective when the sun went down. That highlighter was of course Dior Shimmer Powder in Amber Diamond. It went perfectly with the peachy pink tone of the Chantecaille blush.

To give my eyes more dimension, I used the Benefit Creaseless Cream Eyeshadow in RSVP as a base. I love this shade as a base for neutral eyes.

This Dior Eyeshadow Palette in no.609 (Earth Reflections) is the perfect compact for a really gorgeous neutral eye. I used the ivory shade all over the lid and in the inner corners, then the mid and darker taupe shades to define the crease. I used Mac Vanilla e/s on the browbone for a natural highlight that wasn't too reflective for the daytime.

These Ardell 109 false lashes are one of my very favourite from any brand (my other favourite is the Ardell 110 style). I always apply them after I have put on the base and BEFORE I apply my eyeshadow. I just find that it's easier to get them to adhere to the lashline when there's minimum product getting in the way. I just trim about a centimetre off the inner corner of the false lash with some sharp nail scissors as this tends to be the bit that aggravates my eyes and makes them uncomfortable to wear. Once I have done that, I always use Revlon's lash glue because it lasts the longest on my eyes. I leave the lash for 30 seconds whilst the glue gets tacky, then I pick up the false lash with tweezers and apply it carefully to my lashline. You can then just use the handle end of the tweezers to pat it down and make sure it has adhered properly. Practice makes perfect when it comes to false lashes and I'm getting better with each application. I can see now why people get so addicted to wearing them! My own lashes look diappointing compared to when I wear these! The best thing about the Ardell 109 and 110 styles is that they look so natural. No one even knows you're wearing false lashes unless they really study you close up. I highly recommend these two Ardell lashes...believ me, if I can do it then anyone can!

I used Benefit High Brow to line my waterline giving a fresh, bright look to the eyes. I then used Estee Lauder Double Wear Zero-Smudge Liquid Eyeliner in Black to create a subtle cat eye. This is the ONLY liquid eyeliner I can rely on not to smudge, flake or budge when I'm out all day or night. It's practically bulletproof! It does dry glossy, but if you don't like that, you can always go over it with Mac Carbon e/s to give it even more lasting power and make it appear matte.

I use my Benefit Brows A Go-Go palette every day to shape and define my eyebrows. I only ever use the blonde shade on the left though and the little angled brush is perfect for a precision application. Estee Lauder Brow Gel was used to make sure my brows looked tidy and groomed. Then a very light dusting of Benefit Powderflage was used under the eye to tidy up any eyeshadow fall out.

I have been using these two Jemma Kidd Makeup School Pro brushes for the past couple of weeks and I have to say that I absolutely adore them already. The top one is the no.12 and I use that for face powder. It's so soft, it picks up exactly the amount of product I need just by gently dabbing it on the pan and it hardly ever sheds any fibres. The brush below that, the no.6 Pro Crease Brush, is actually what I use for concealer because it has the perfect firmness for blending the product into the skin and creating a flawless finish. It's especially good for blending liquid concealers under the eye and I use it for the Origins Quick, Hide! Concealer. They both feel really high quality and I love the black and hot pink handles! You can get these brushes from Feel Unique (no.12 is £27.50 and no.6 is £18.00 with free delivery).

I'm still loving this Daniel Sandler Micro Bubble lipstick in Flamingo (the shade I'm wearing in the header for my blog). It can be difficult to find vivid shades to suit your complexion so I'm holding onto this baby and will repurchase it when I run out. I lined and filled in my lips with Estee Lauder Double Wear lipliner in Pink beforehand, then applied the Daniel Sandler lippy with the lip brush on the other end of the liner, blotted it, then applied it again. I was shocked when my lipstick lasted all the way from 11am, through sipping chamoagne and the three course meal, right through until 7pm when I quickly reapplied it lightly. My lips were still stained with the colour so I only had to lightly pat the lipstick on the inner part of my lips. The EL liner really does give this lipstick incredible staying power!

For my hair, I washed it with Kerastase Bain Mirroir Shampoo and then conditioned it with a light conditioner - Aussie Lusciously Light Mega Instant Conditioner. I then towel dried my hair and applied Frederic Fekkai Full Volume Mousse to the roots and lengths. This mousse is so light but so effective and it helped to give my hair wavy until 3am! It's great if you have fine hair that really needs a boost. I dried my hair with a round brush to make sure it was smooth and shiny. I then used my Babylis Conical Wand to curl my hair, taking 1 inch sections and holding it for 10 seconds. Once I had finished a section of hair, I sprayed it with Aussie Volume and Gloss Hairspray to make sure it stayed in place. It took a good 30 mins to do my whole head so my arms were aching a bit afterwards. I have fine hair but I also have quite alot of it!

Once I had finished curling my hair, I sectioned it off, backcombed the roots and then put two pre-curled Foxy Locks wefts (a 4 clip and a 3 clip on top of that) into the lower back sections of my hair. I just wanted to gain a bit more volume at the back since I was planning on clips back the sides. The Label M Metal End Tail Comb is perfect for sectioning off hair and also for backcombing at the roots. It's only £6.00 from the Label M website and it always comes in really handy when I'm doing something a bit different to my hair. I finished off my hair by clipping back the sides of my hair with a tiny clasp at the back, leaving some strnads free at the front to frame my face. I then combed my curls through with my Macadamia Natural Oil Comb to blend my hair with the extensions and also to stop the curls from looking too structured.
And there we have it! I hope you're all still awake after all that info!


No comments:
Post a Comment